

Connect
1
Save the Vapi keys
In Vapi, open Settings > API Keys and copy both keys. In Bluejay, open Settings → Integrations and choose the Vapi tab. Paste both keys there.
- Private API Key: Bluejay uses it to sync assistants and open test calls.
- Public API Key: Bluejay uses it as the webhook secret. Vapi must send it back on every webhook, as in the last step.
2
Sync the assistants
Click Sync Agents from Vapi to import every assistant and squad as an agent. A sync also links each assistant to its agent, so Bluejay accepts its webhook. To keep Bluejay current when you change assistants in Vapi, turn on Autosync from Vapi.
3
Send each call to Bluejay
In Vapi, open each assistant and go to Advanced > Webhook Server.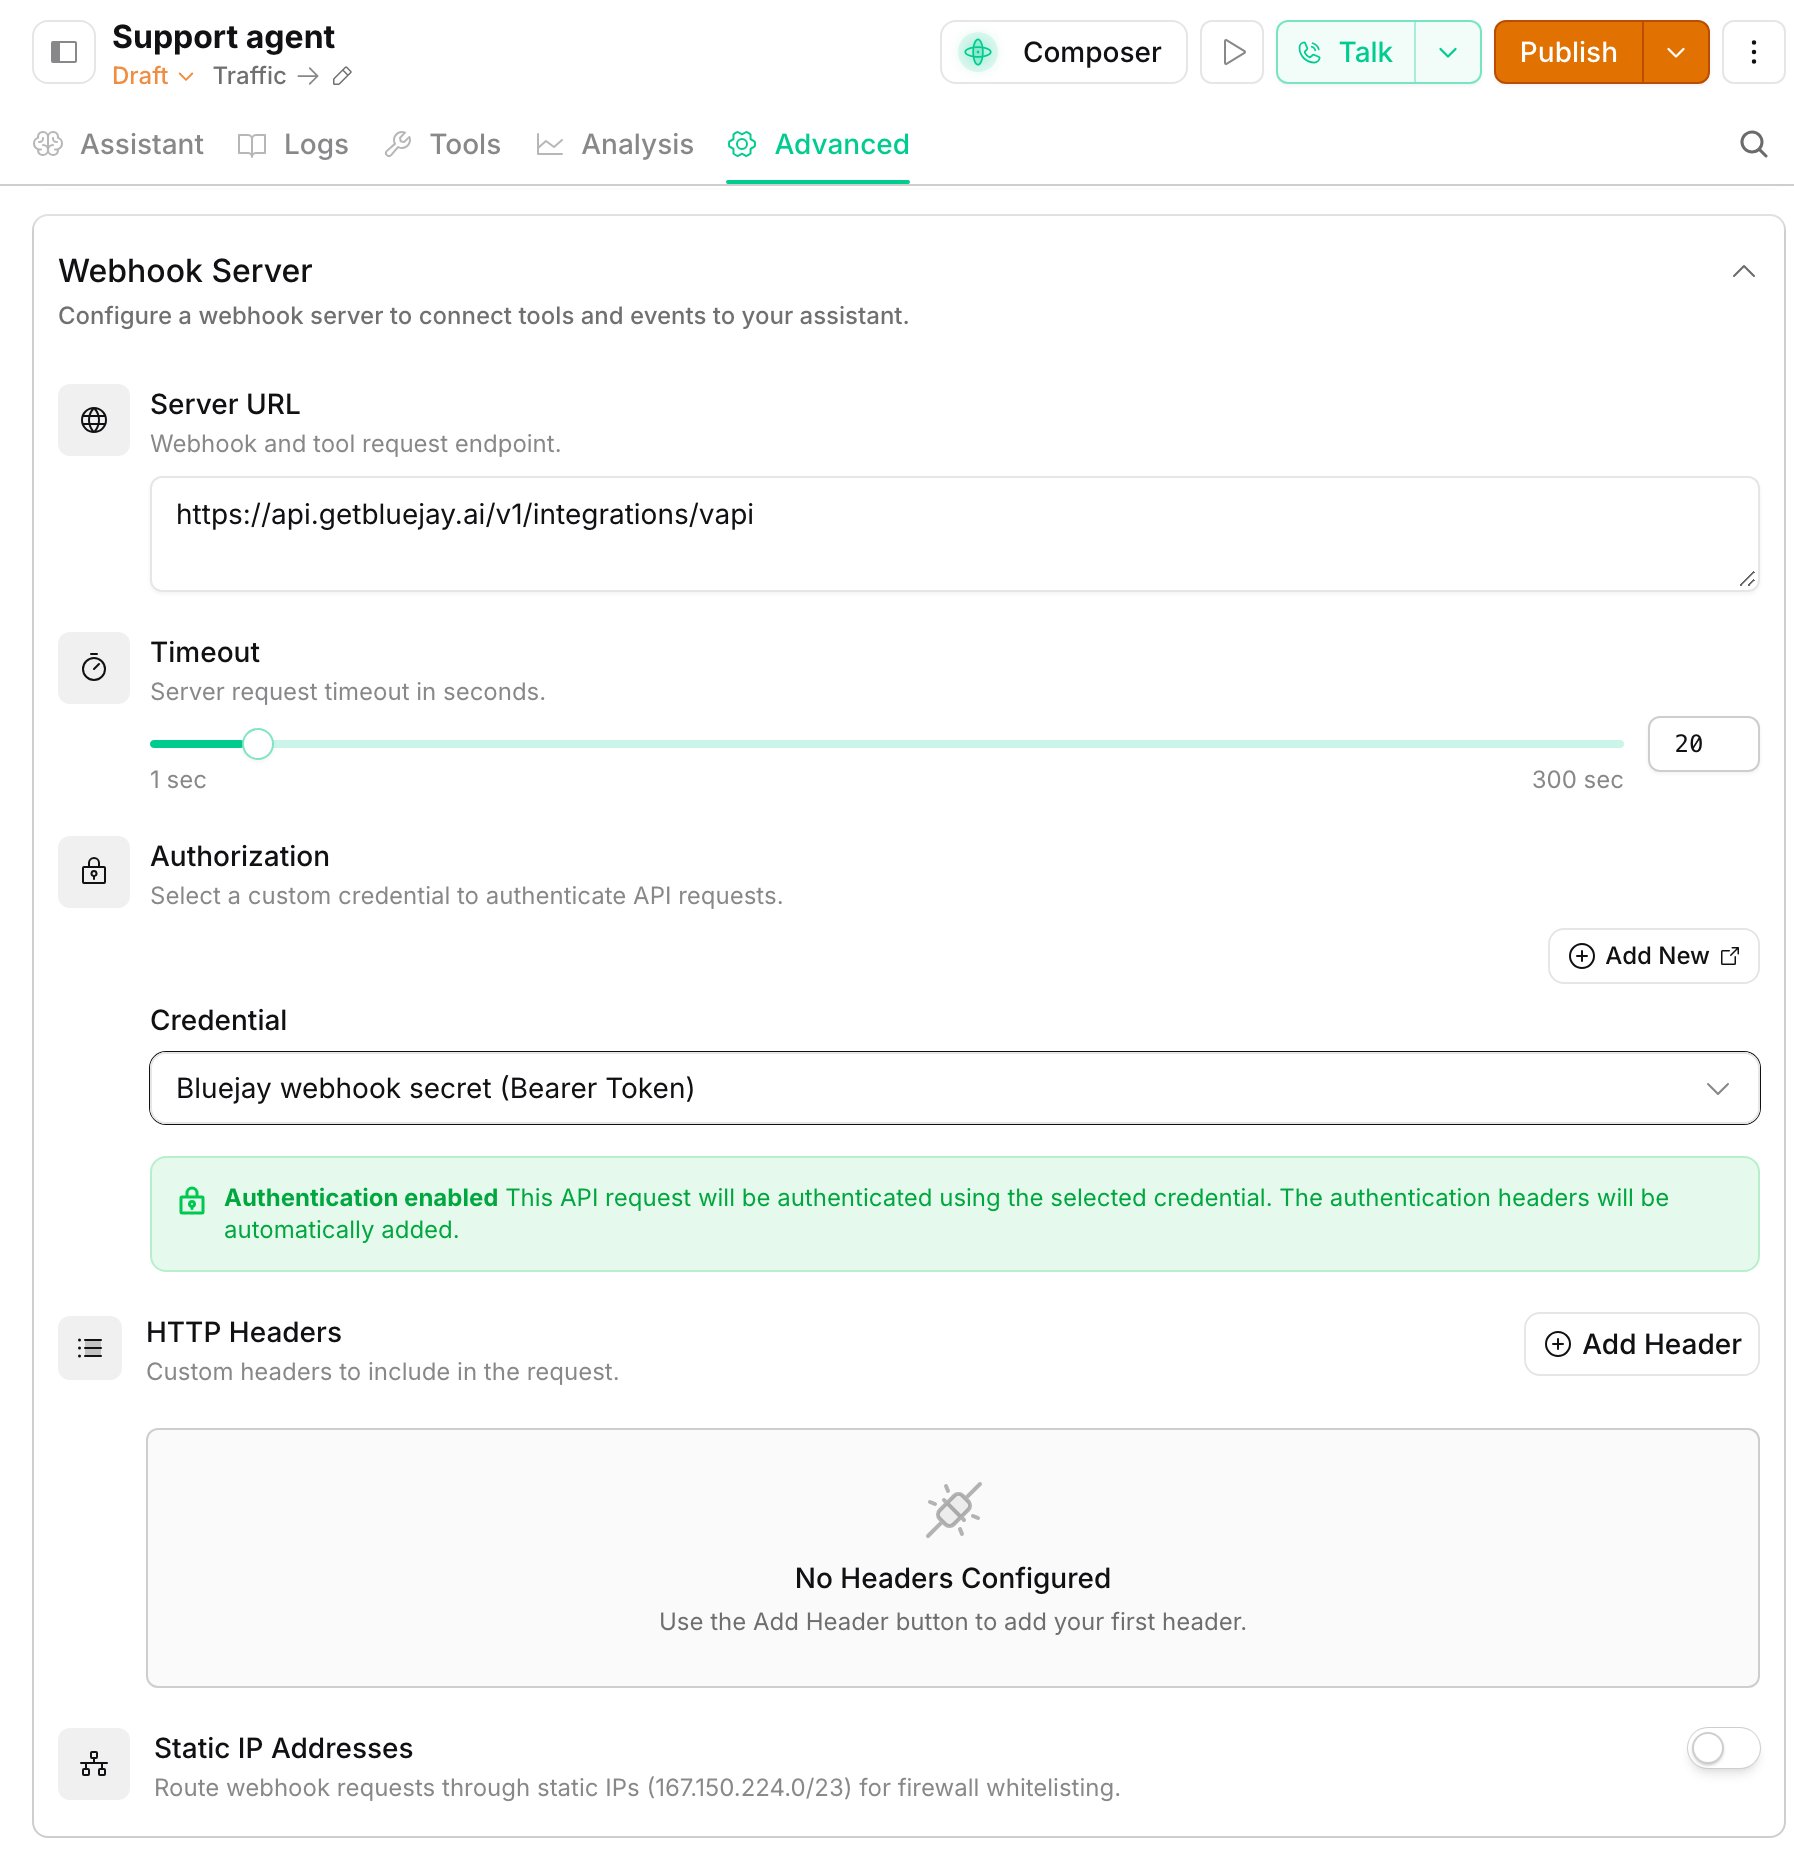
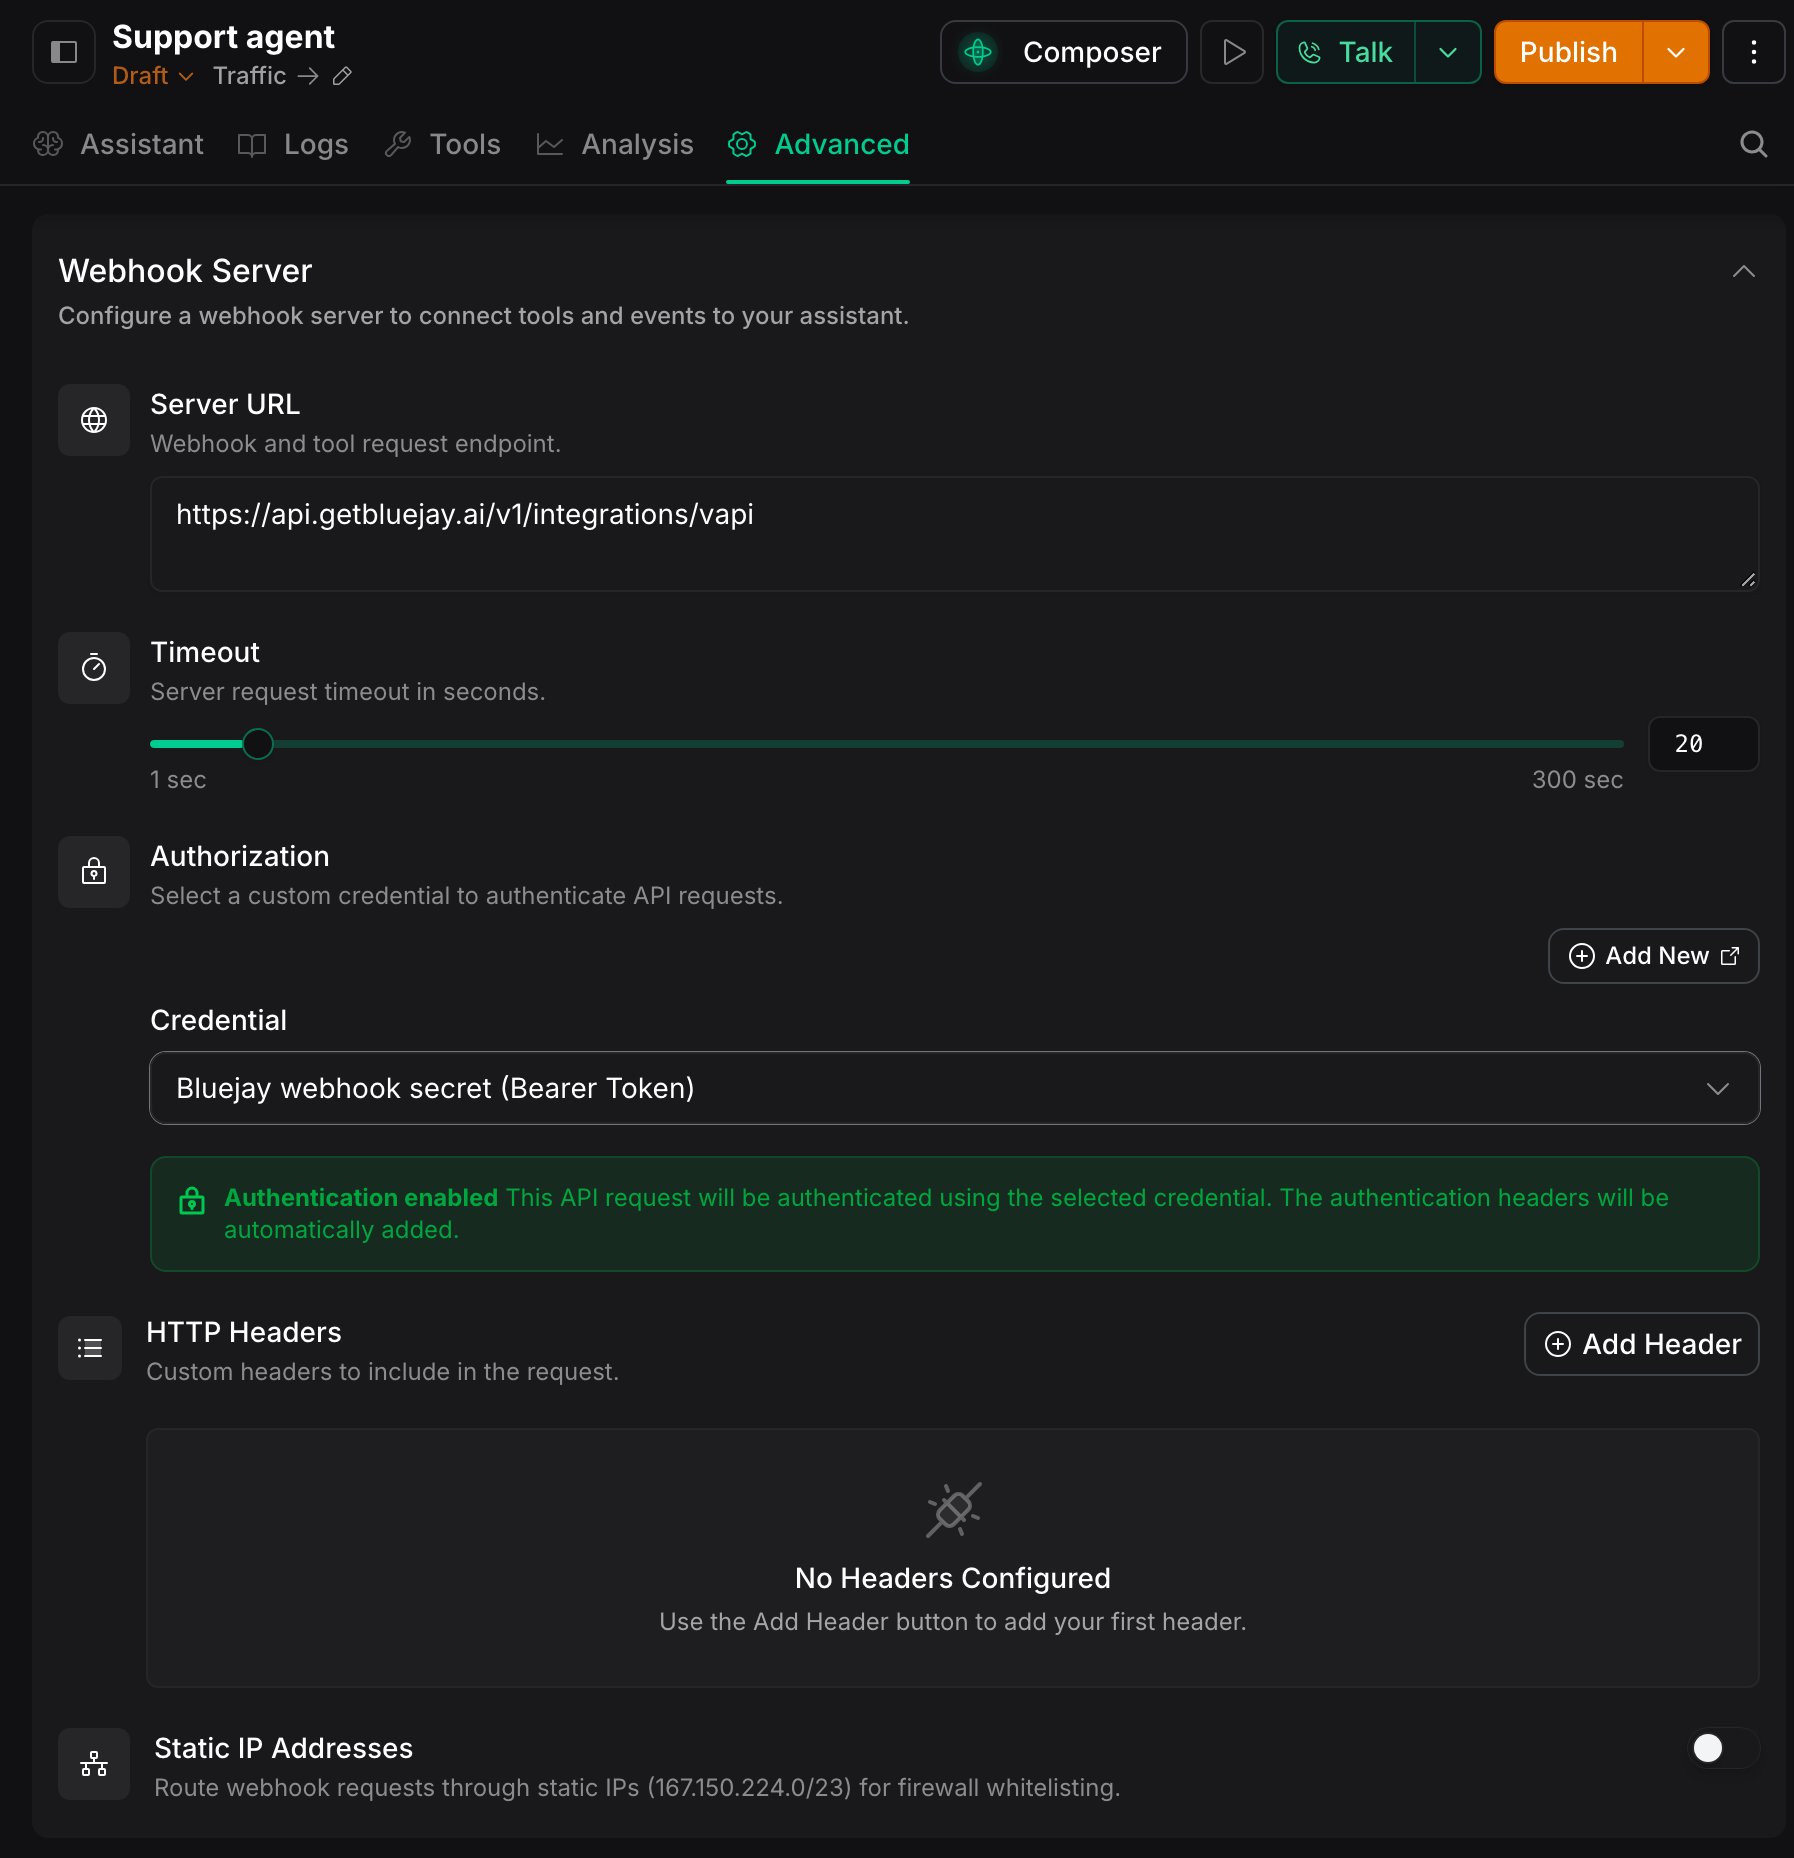
- Set Server URL to
https://api.getbluejay.ai/v1/integrations/vapi. - Under Authorization, create a Bearer Token credential. Set Header Name to
X-Vapi-Secret, turn Include Bearer Prefix off, and paste your public key as the Token. Select the credential. - Under Server Messages, keep only
end-of-call-report. - Click Publish.
X-Vapi-Secret as an HTTP header instead of a credential.- Connection Settings: choose the VAPI tile and set VAPI Assistant ID.
- Observability Settings: set Voice AI Provider to VAPI and Assistant ID to the same ID.
Edit an assistant
1
Pull the assistant
On the synced agent’s Workflow tab, pull the assistant from Vapi. A synced squad has a Squad tab instead, where you edit its graph.
2
Edit and push
Push your edits back to Vapi. A push updates the assistant itself, so callers hear your edits on their next call.
- Test
- Monitor
- WebSocket
- Phone
- SIP
- Outbound
Bluejay calls the assistant over a Vapi WebSocket, so no phone number is necessary. Use this path to iterate on the assistant’s logic.A WebSocket call works only with an Inbound agent, and your assistant speaks first. To test calls that your assistant places, use the Outbound path.